5 Best Solar Kits for a Tiny Home

A solar power system is a key component of off-grid living. Solar panels, batteries, and chargers allow you to use electricity in your tiny home, trailer, or campsite without relying on a utility connection, or a noisy generator.
Solar panels offer silent, convenient, and reliable power for your trailer or tiny home while also reducing your carbon footprint and power consumption, but not all solar panel kits are made equal or energy-efficient. If we’ve caught your attention, read on to see what our recommendations are for the best solar kits for a tiny home are.
What’s in a Solar Kit?
The best solar kits will come with a set of solar panels, a solar charge controller, and output cables. The power output of solar panels is largely dictated by the size of the unit. A smaller set might produce 100w per hour, while larger panels can go much higher.
Solar kits work best if you pair them with a power station to store and disperse the energy as you require it. A solar power station is effectively just a battery that takes a charge from the panels and releases energy on demand.
What Makes a Good Solar Kit?
The best solar kit for your tiny home will depend on a range of factors, including:
- Your energy needs. (Appliances like refrigerators can be a real drain on your power)
- The space you have available either on your roof or the ground around your tiny home.
- The power storage you have available.
- Able to satisfy the needs of a small home’s energy consumption
- The type of connectors you need.
Good quality solar kits have a high conversion efficiency—that is, how much of solar energy they convert into electricity—as well as robust build quality. We have chosen to highlight monocrystalline solar panels here because they are efficient even on cloudy days. All of these solar panels are not grid-tied systems, meaning you can use them anywhere that there’s sunlight.
With all that in mind, here are five of the best solar kits for your tiny home based on how you use it.
Best Solar Kits for Tiny homes
1. Most Versatile Solar Kit: FATORK 100W Portable Solar Panel Kit
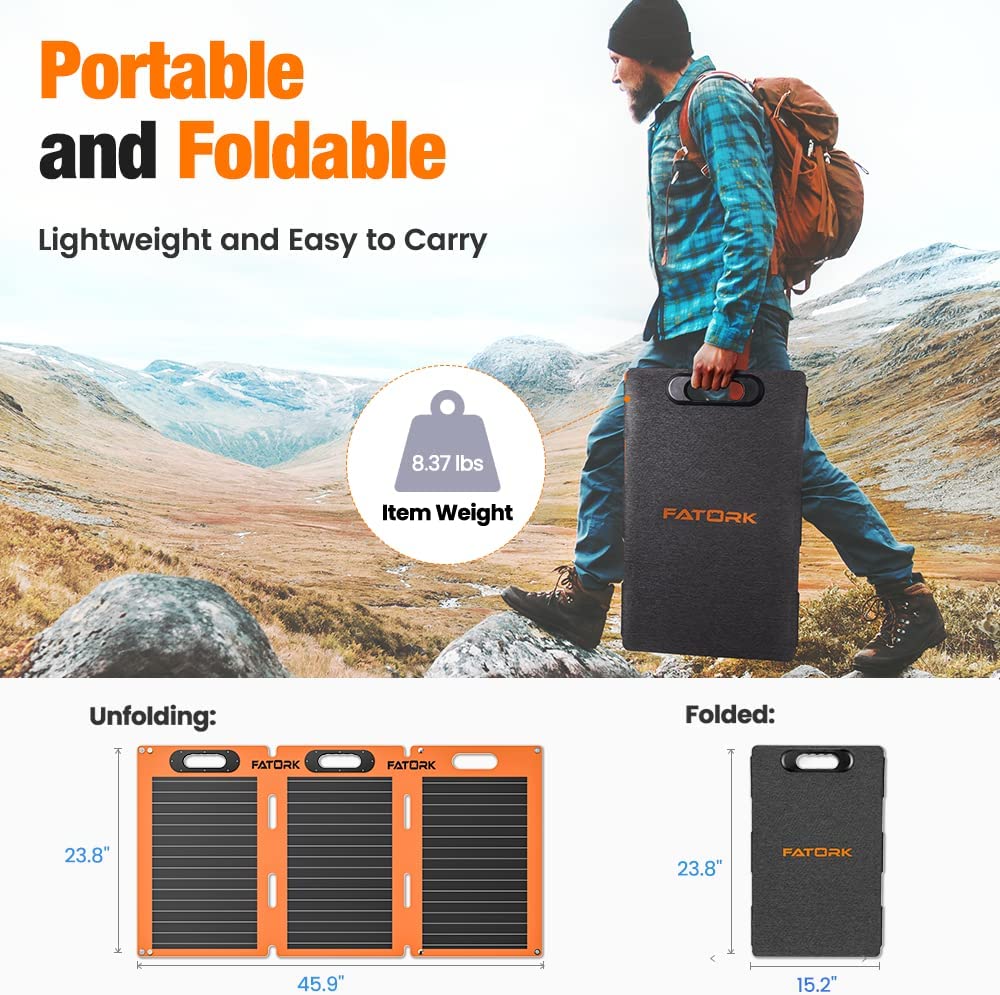
Product specifications
- Peak Power: 100w
- Conversion Efficiency: Up to 24%
- Dimensions (folded): 23.8×15.2×1.1 inches
- Dimensions (unfolded): 23.8×45.9×0.16 inches
- Weight: 8.37 Pounds
- Connectors: XT60 / Anderson / DC7909
The Good
- Compatible with multiple power stations
- Affordable
- Convenient and portable
The Bad
- Limited weather resistance
- Modest power output
This lightweight and portable three-panel solar kit from Fatork boasts a 100w output and three connectors, XT60, DC7909, and Anderson. These output cords make the kit compatible with the majority of portable power stations including, Bluetti, EF Ecoflow, Jackery, and more.
Fatork uses monocrystalline silicon panels for high conversion efficiency, so you get good, consistent power even in low-levels of sunlight.
A built-in carry handle in the high-visibility panel surround makes it easy to transport the panels, and you can find them even in the dark. Magnetic clips hold the panels securely in place when folded, and two kickstands help you position the panels exactly where you need them. A zip-up carrying bag stores the panels and power cords for safe transport.
The panels are IP67 waterproof and durable thanks to a scratch-resistant, heat-resistant, and chemical-resistant ETFE coating. You can leave these panels in light rain but should put them inside if the rain is heavy or if they are sitting in water.
The panels operate at 24% conversion efficiency.
2. Best High-Output Solar Kit: RICH SOLAR 800 Watt 12V Solar kit
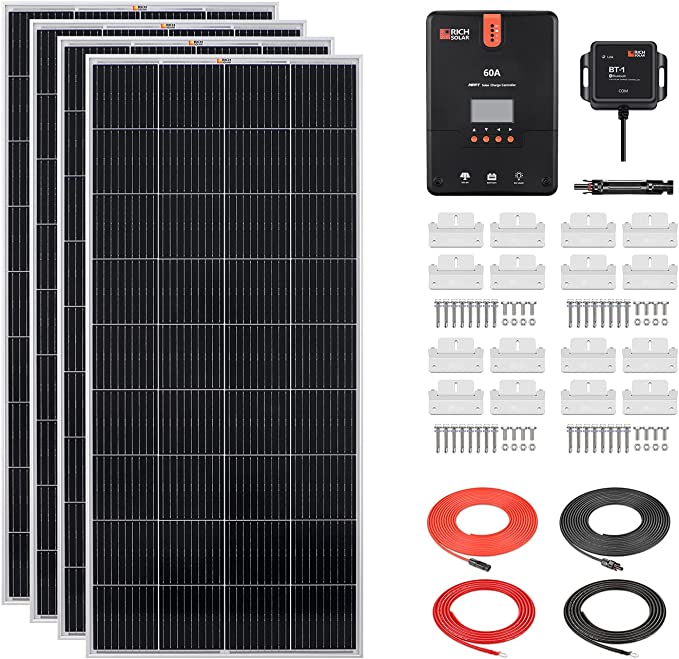
Product specifications
- Peak Power: 800w
- Conversion Efficiency: Not listed
- Dimensions (single panel): 58.7 x 26.8 x 1.4 inches
- Dimensions (four panels): 238.4 x 107.2 x 1.4 inches
- Weight: 26.5 Pounds
- Connectors: XT60
The Good
- Excellent power output
- High-end charge controller
- Easy to set up
The Bad
- Large surface area
- Simple and cheap connectors
Four of RICH Solar’s high-efficiency 200W monocrystalline panels combine in one solar power system designed for tiny homes with big power needs.
The 60A maximum power output tracker (MPPT) controller combined with nine busbars to distribute electricity inside the panels help ensure maximum efficiency and output at all times. Inline fuses help protect the panels, the controller, and your devices from electrical spikes adding extra security.
The MPPT charge controller is also Bluetooth enabled for ease of use. This high-power solar system is ideal for long-term off-grid living and can be pared with large power stations for reliable and consistent energy supply.
RICH Solar systems are plug-and-play with no crimping tools required, so it’s easy to set up and break down the system to head out on the road, and it’s easy for anyone to do.
This solar system kit is supported by a 25-year output warranty.
3. Best Briefcase-Style Solar Panel Kit: Renogy 200 Watt 12 Volt Portable Solar Panel with Waterproof 20A Charge Controller
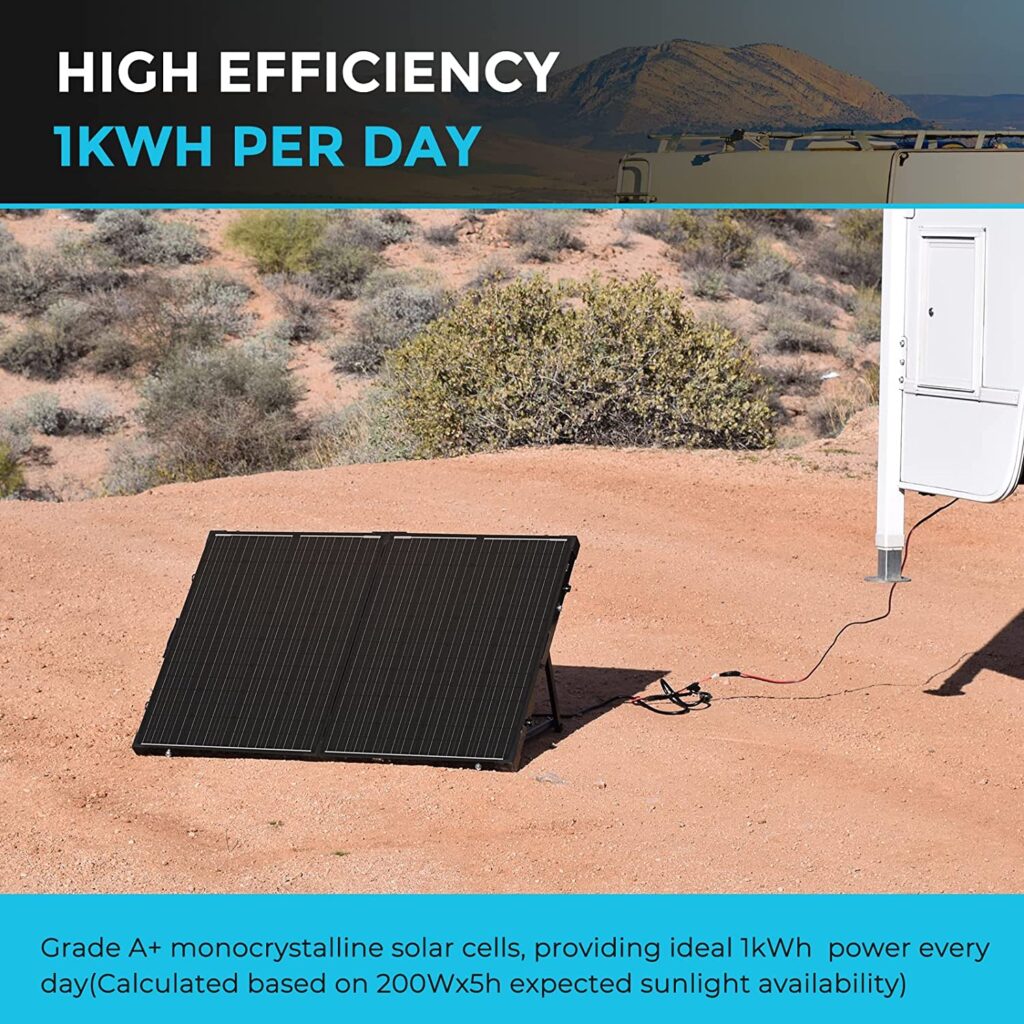
Product specifications
- Peak Power: 200w
- Conversion Efficiency: 21%
- Dimensions (folded): 35.6 x 25.9 x 3.1 inches
- Dimensions (unfolded): 51.8 x 25.9 x 1.55 inches
- Weight: 36 Pounds
- Connectors: MC4
The Good
- Proven brand
- Good efficiency
- Portable and robust
The Bad
- Price for output
- PWM controller isn’t as efficient as MPPT options
Renogy is one of the more proven names around when it comes to renewable energy systems for tiny homes, campers, or RVs. The company’s 200W 12-volt solar panel kit with a 20A charge controller is well-sized for most tiny home dwellers.
You will pay slightly more for Renogy systems than others you find, but the connectors, charge controllers, and the panels themselves are all of high quality. This system combines two monocrystalline panels in a briefcase-style folding unit with a built-in stand.
It’s interesting that Renogy pairs this system with its pulse-width modulation charge controller (PWM). PWM controllers aren’t as efficient as MPPT options, and Renogy does make both. It’s possible Renogy opted for PWM here because it’s safer, and allows this kit to have four charging modes with different levels of protection. That way you can protect your battery bank by offering up a slow charge to start, then a boost to bulk charge, before maintaining a floating charge or equalization charge. This is the safest way to charge and keeps your batteries lasting longer.
Of course if you prefer to, you can just change out the controller for one of Renogy’s MPPT options later to get more efficient charing. This entire set up is expandable for more power, and you can build on it as you go.
The energy panels will produce reliable electricity from the sun for 25 years and Renogy also offers a three-year warranty on workmanship and materials.
4. Best Solar Kit for DC Batteries: Grape Solar 100-Watt Off-Grid Solar Panel Kit
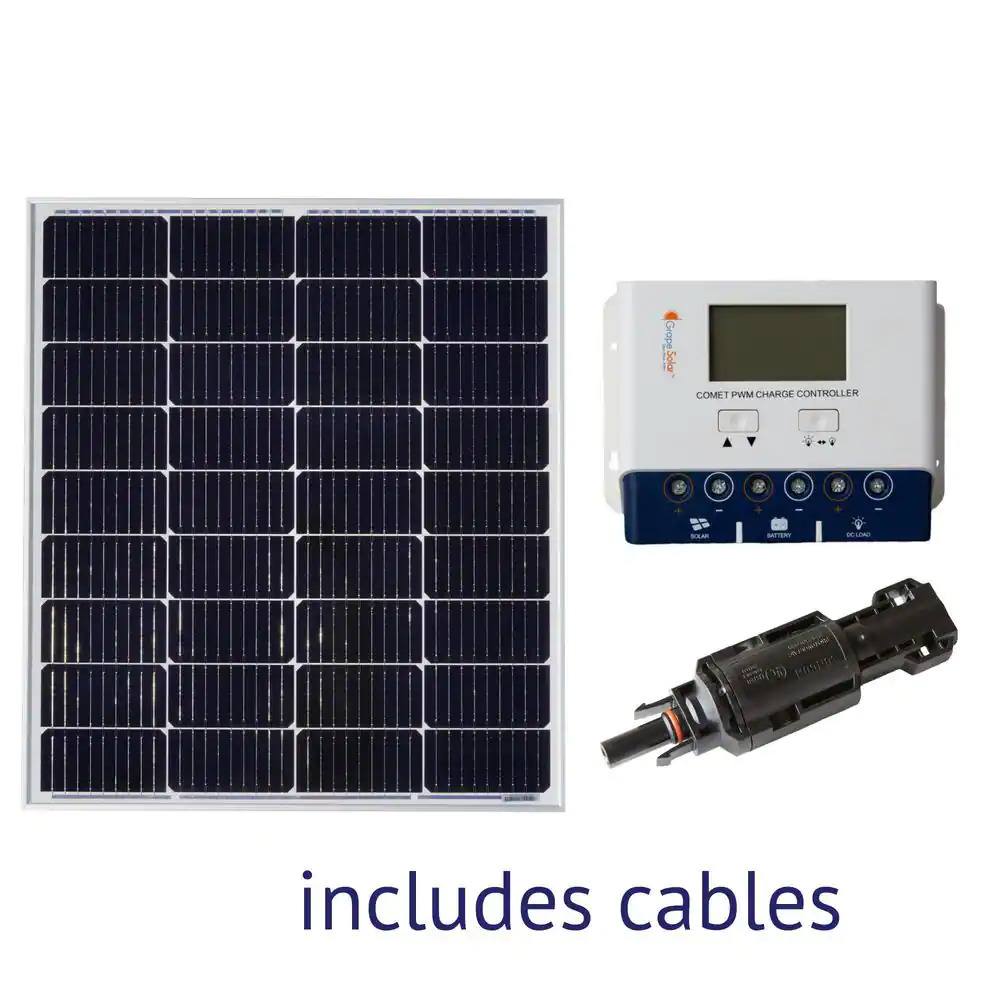
Product specifications
- Peak Power: 100w
- Conversion Efficiency: Up to 24%
- Dimensions (single panel): 31.89 x 28.15 x 1.38 inches
- Dimensions (unfolded): Not applicable
- Weight: 15.4 Pounds
- Connectors: MC4
The Good
- Excellent power output
- High-end charge controller
- Easy to set up
The Bad
- Large surface area
- Simple and cheap connectors
The Grape Solar kit is a simple, small solar charging kit ideal for a true, goal-zero off-grid system. If all you want to do is charge a few small devices or charge a small power station in your tiny home this 100w off-grid solar kit is a solid idea.
It’s best suited for circuits with a 12v deep-cycle battery (or many) which makes it good for RVs and boats as well as tiny homes. You can pair a 12v deep-cycle battery with an inverter for higher voltage appliances.
With one anodized aluminum frame measuring approximately 32×28 inches this isn’t a small panel. On the plus side it is weatherproof and comes with a sealed junction box so you can leave it outside in any weather. A 40A charge controller helps keep the charge consistent, and you can expect about 300 Watt Hours of charge per day from this system.
You can easily add more Grape Solar panels to your system to increase capacity and gain more energy from the system.
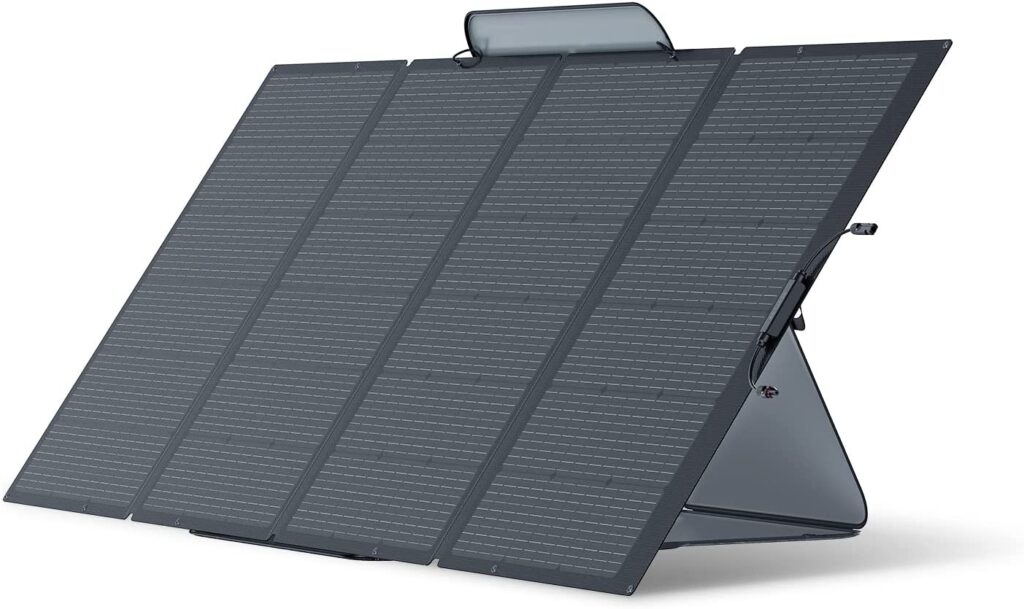
5. Best Solar Panel For Rugged Country: EF Ecoflow Adjustable Kickstand Solar Power Kit
Product specifications
- Peak Power: 400w
- Conversion Efficiency: Up to 22.4%
- Dimensions (folded): 23.2 x 20.2 x 0.8 inches
- Dimensions (unfolded): 41.7 x 93.1 x 1.0 inches
- Weight: 34.2 Pounds (with case)
- Connectors: MC4
The Good
- Rugged built quality
- Solid output
- Portable
The Bad
- No charge controller
- Price
EF Ecoflow’s medium-high capacity solar kit is a four-panel, 400W off-grid energy system that can help you keep your tiny home powered up reliably in most conditions.
Flexible EVA and fibreglass framing make this foldable four-panel system easy to move and pack away, while keeping it robust enough to stand off-road adventures. The Monocrystalline cells are coated in ETFE film which helps keep them safe and scratch-free. The solar kIt also boasts a IP68 Waterproof rating which not only means it’s water tight but will keep dust out of sensitive components.
A set of MC4 connectors make it easy to connect this system to most off-the-shelf powerstations as well as the fleet of stations offered by EF Ecoflow in its Delta, Delta Max, and Delta pro iterations.
The panels come in a dual-purpose carrying case which also operates as a kickstand for the panels when you set them up. Locking tabs keep the panels aligned when they’re unfolded.
The EF Ecoflow solar panel system is among the pricier options because of the build quality. The system also doesn’t come with a charge controller, so you’ll have to pick one up separately.
FAQs About Solar Kits
As a homeowner, the amount of solar panels you need will depend on your energy requirements. For a true off-grid experience you might only need 100W panels, with 800W solar panel systems handling the needs of most modestly equipped tiny home. The good news is you can always build on your solar system to use more renewable energy as your needs and budget grow.
Electricity from the sun into your devices inside your tiny home is both simple and complicated.
In simple terms your solar installation requires:
– A device to capture energy
– A way to control that energy
– A way to store that energy
– A way to convert that energy into usable energy for your devices
Usually, this is done by the following:
Your solar panel “collects” the sun’s energy and converts it to electricity.
The charge controller, which makes sure the energy coming in from the solar panels is controlled properly and doesn’t overcharge your battery bank, power station.
Your solar battery bank or power station is how you store that electricity for future use.
Inverters convert DC electricity from your panels into AC electricity to use your devices. They usually come with 110v household-style outputs and even USB outputs you can plug into. Some power stations double as an inverter, so you don’t need a separate device.
These systems combine together to create a solar generator that can power any number of devices.
A 400W solar power system will run a laptop computer, a television, and even gaming consoles. It’ll also run small fans, and small condenser-style coolers as well.
A 100W solar panel kit is usually enough to charge small devices like phones and tablets, power some lighting, and charge a small power station or battery bank. Because it’s a modest amount of power, you should look for ways to conserve energy like using LED lights instead of conventional bulbs.
Most solar panel kits for tiny homes operate on a 12v system, while some step up to either 24v, 48v or higher. The important part is the charge controller, and how it sends electricity into your energy storage system.
You should look for a power bank or station that is matched with your solar panel setup, but remember, the first question is: How much energy do I need? This is usually calculated in watt hours.
Watt hours are the wattage a device uses over one hour. You can use this figure to determine what size battery and solar panel kit you need.
For example, a 50w light bulb uses about 50w an hour. If you have a lightbulb and a 100w laptop, than you’re using 150w per hour that they’re on. Let’s say both are on for 12 hours a day, you will use 1800 watts per day, or 1.8 kilowatts. A power station and battery bank capable of storing a little more than that should keep you with enough power if you use a 300w solar panel kit to charge the system.
Best pre-built cabins under $10,000
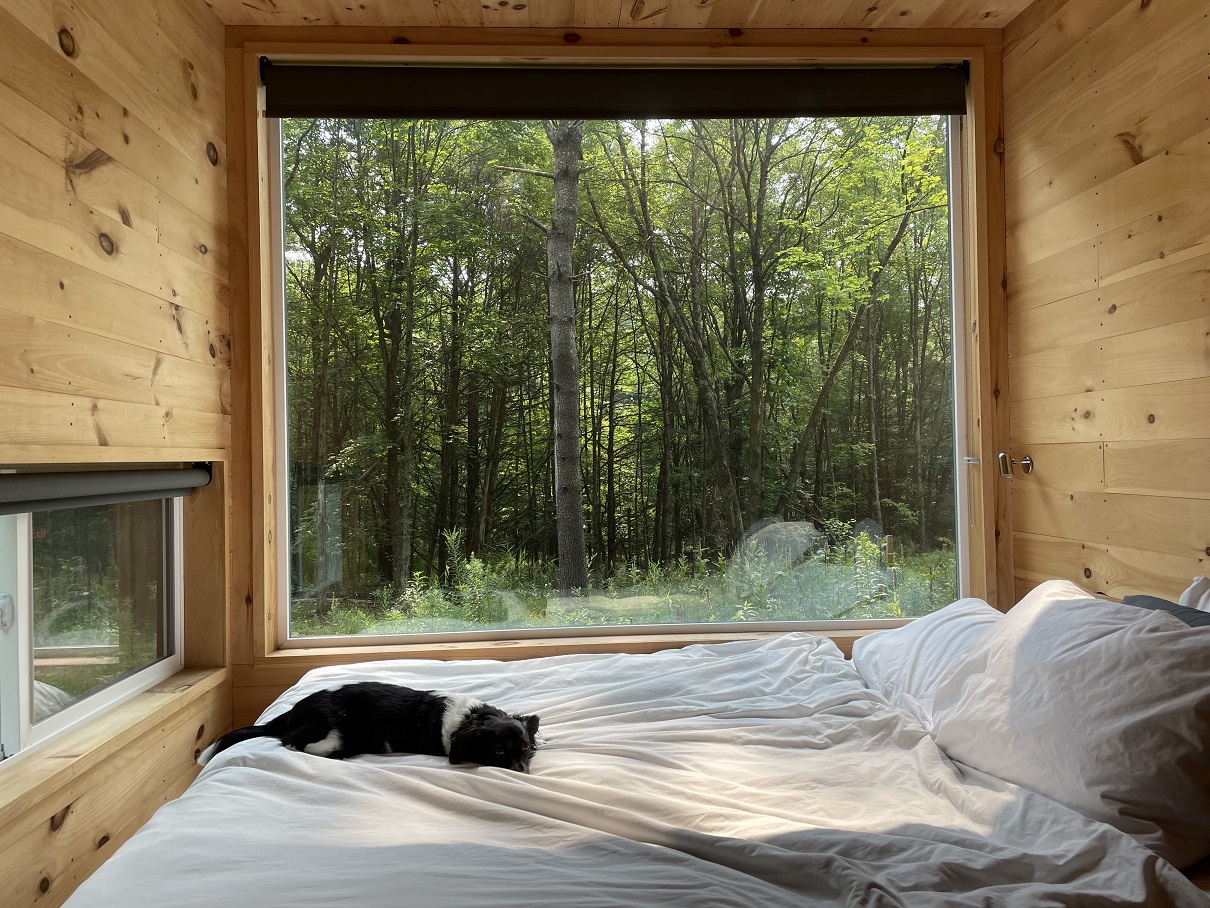
There’s something adventurous and romantic about the idea of a log cabin. The rise of the tiny homes trend has made it easier and more affordable than ever to find prebuilt cabins.
These prefabricated (prefab) dwellings look great and are an easy way to add living space to your cottage, your home, or your campsite at an affordable price.
Where can you use a log cabin?

Little log cabins are great for a variety of places. You can use them for things like:
- Your residence on your cottage property
- An in-law suite at your home or cottage
- A guest house
- An at-home office space
- A workshop
- A temporary cottage
- A glamping upgrade at your lakefront lot
- A fishing hut on the lake in winter
Whether your cabin is a place to get away from it all, a place to focus up and work, or an extra living area for guests at your home or cottage, there are options for all sorts of budgets and needs.
How much does it cost to build a prefab cabin?
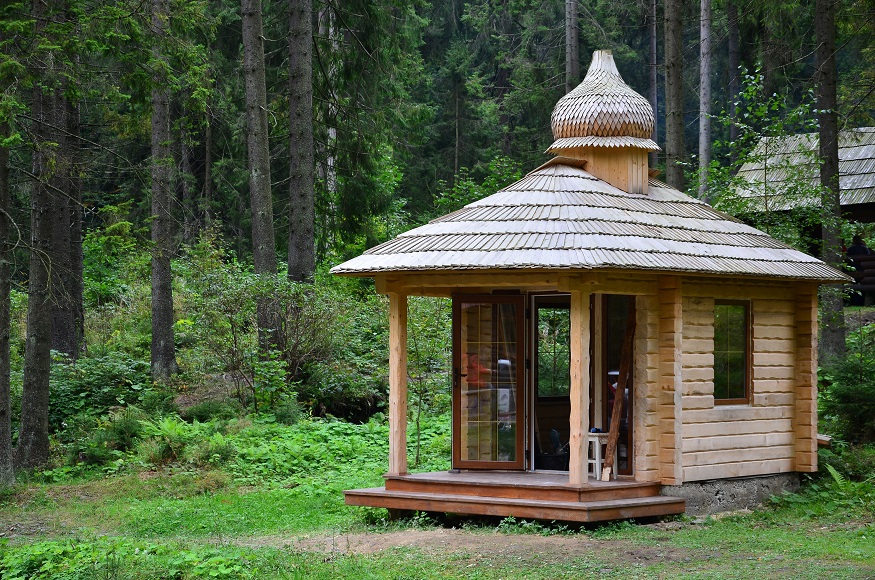
Small prefab cabins begin from just under $10,000 and soar well over $100,000. The cost will depend on what amenities you want. Features like insulation, locking windows, storage, and aesthetic trim all cost more. Some luxury prebuilt cabins are every bit as luxurious as any other modern home.
The costs of installing one on your property will depend on factors including:
- Land tax or land fees
- Transport costs to get the cabin to your property
- Local labor costs
You may also need to pay to connect your prefab cabin to electrical, gas, or plumbing infrastructure at the site.
Is it cheaper to build or buy a cabin?

There are three ways to put a log cabin or tiny home on your property:
- Build from scratch
- Use a tiny home kit or prefab cabin kit
- Buy a prebuilt cabin
If you have the right skills you can build a cabin from scratch, but one of the best ways to get into a log cabin or prefab tiny home is to buy a kit. Prefab cabin kits usually include all of the main structure including the framing, panels, roofing system, and floor structure. There are a variety of different floor plans and features to choose from.
You can add or remove options like floor coverings and countertops to your tiny house kit depending on your budget and your needs.
Can I build a log cabin in the middle of nowhere if I own the land?
Sometimes it’s tempting to just move out to the desert and build your own full-time off-grid cabin to getaway in. Whether or not you can build log homes in the area you’ve purchased land will depend on zoning. Every municipality and region has its own zoning laws. This zoning map from the town of Monument in Colorado is one example of the sort of document you need to check to see if modular cabins are allowed.
If you’re building an off-grid home or a weekend getaway you’ll have to deal with more restrictions and permits than if you’re only building a shed or workspace.
In many cases, it’s easier to put a prefab log cabin on your existing residential property—especially if it can be classed as a Detached Accessory Dwelling Unit or DADU. Zoning rules in Tennessee, for example, allow tiny homes less than 700 square feet, which are “subordinate in size, height, and purpose to the principal dwelling”.
What’s the difference between a tiny home on wheels and a prefab cabin?
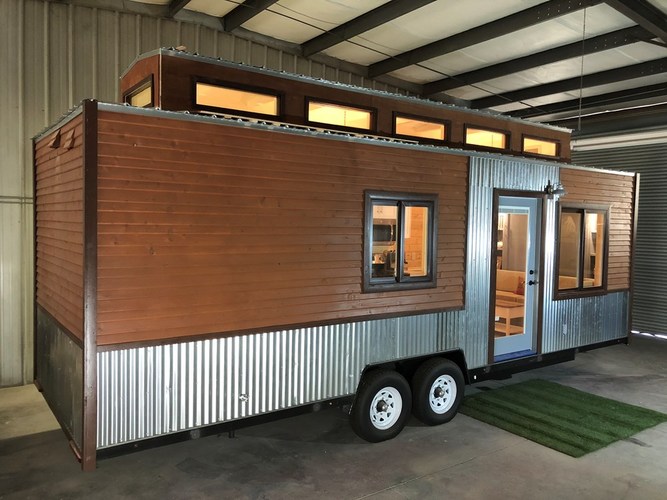
A full-size prefab cabin is similar to any stick-built home – only built offsite and moved into position. The construction is similar to normal homes, with wooden framing, exterior and interior cladding, plumbing, and electrical.
Smaller prefab cabins are built in the same way, but you might not get plumbing or electrical integrated.
A tiny home on wheels used this same concept, only scaled down to less than 400 square feet and mounted on a towable platform.
There are lots of variations within these categories. Some prefab cabins have a charming Amish look with wood accents, others are genuine log cabins in prebuilt sections. Others are more utilitarian.
What are the carrying costs of owning a log cabin?
A log cabin or a prefab tiny home will have similar ongoing costs. Some of these vary widely, and include:
- Land tax
- Municipal fees
- Insurance
- Lot rental
The good news is that most of these costs are relatively small. You can expect to pay between $1,500 and $3,000 for land tax, council fees, and insurance combined. If your rent the land your log cabin is on, you may not have to pay the land tax or council fees but will have to pay rent. Rent is more expensive in desirable areas but cheaper in more remote areas.
Log cabins under $10,000
It is possible to buy prefab homes for less than $10K. You’ll need to do a fair amount of DIY work to fit out the interior, and will usually have to do some assembly onsite, but it is possible. Another option is to buy a pre-owned log cabin and move it to your new site. Small cabins are less expensive than larger ones, and the features and fitout options change the pricing. In short, if you don’t mind a smaller space, or if you’re happy to do a lot of work yourself, you can find a little cabin for not a lot of money.
Here are some prebuilt structures that come in under 10K.
1. A simple cabin kit for your cottage
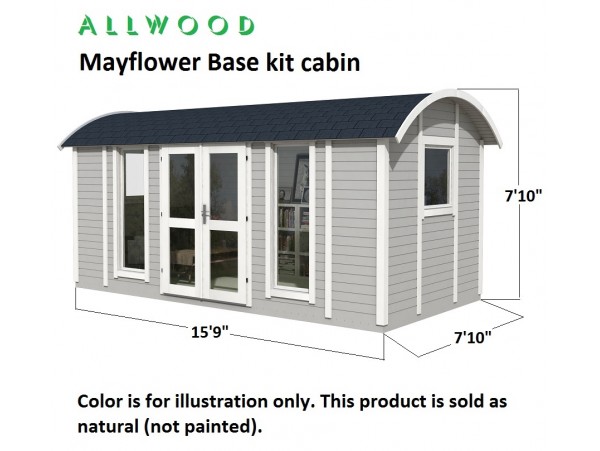
The Allwood Mayflower Base 117 Square foot studio kit cabin is a popular and elegant prefab hut. It includes flooring, walls, roofing, and exterior cladding. You’ll only need a handful of basic household tools to assemble this system, but you will need a friend to help. Expect to take about two days to build the cabin. The images show a painted version but the Mayflower comes unpainted, sealed in a crate.
This kit is also available as a tiny home on wheels for a few hundred dollars more.
2. A prebuilt and installed cabin for under 10K
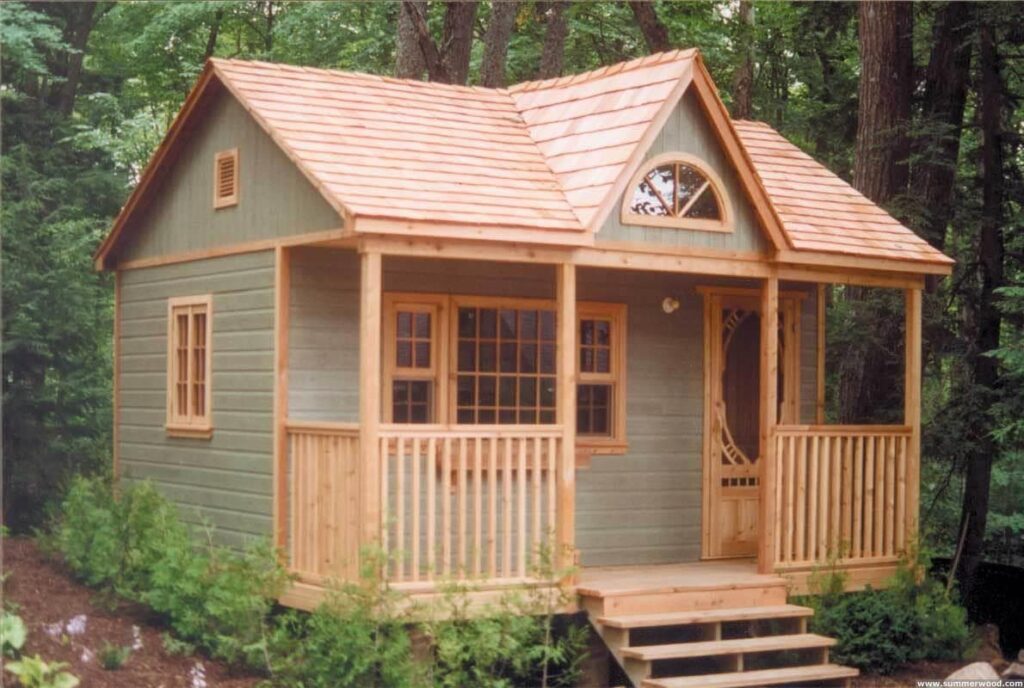
The medium-sized Canmore prebuilt cabin from Summerwood is another sub-10K option with plenty of space and a great-looking, rustic design. The cedar cabin with eight-foot walls and a gable roof is available as a kit, a prebuilt unit, or fully installed on your property. Framed with 2×6 spruce and 2×10 spruce ceiling joists and rafters, this is a robust unit perfect for a temporary cottage or guest house.
Options include insulation, an additional loft space, and interior cedar cladding. All Summerwood cabins are built to make it easy for DIYers to add electrical, plumbing, or extra insulation before finishing. You can also have Summerwood install those options for you during the build process. However, all of these extras will cost more.
3. An inspirational getaway cabin for writers
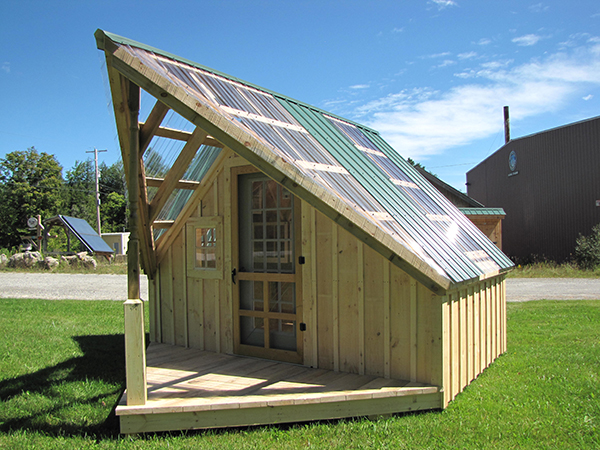
This Amish-style pre-cut log cabin kit from Jamaica Cottage Shop is a stylish A-frame hideaway. It measures 13’2″W x15’2″L x10’6″H with a footprint of 168 square feet and a 36 square-foot porch. Jamaica Cottage Shop includes flooring in the kit, and it can be positioned on a simple gravel pad.
The kit includes plenty of window space for natural light to flood in. With the right interior design, this could be an inspiring artist’s workshop or studio. Two people can assemble this pre-cut log cabin in about 56 hours, so budget at least a week to get your Writer’s Haven up and ready.
4. A cute preowned cabin with minimalist interior
The 10×14-ft Ranch Cabin from Esh’s is one example of a unit you can take home for well under $10,000. This tiny cabin features high-quality exterior trim and a small front porch. The vinyl siding and metal roof all clad on heavy wood framing make this a robust and durable prebuilt cabin that will withstand the elements.
The interior is very bare, but that just means there’s room to make this prefab unit your own. With a little resourcefulness and not a lot of budget you can easily find the items you need to make this a great cottage sleeper, a hunting cabin, or a home office studio.
5. Amazon has prefab cabins
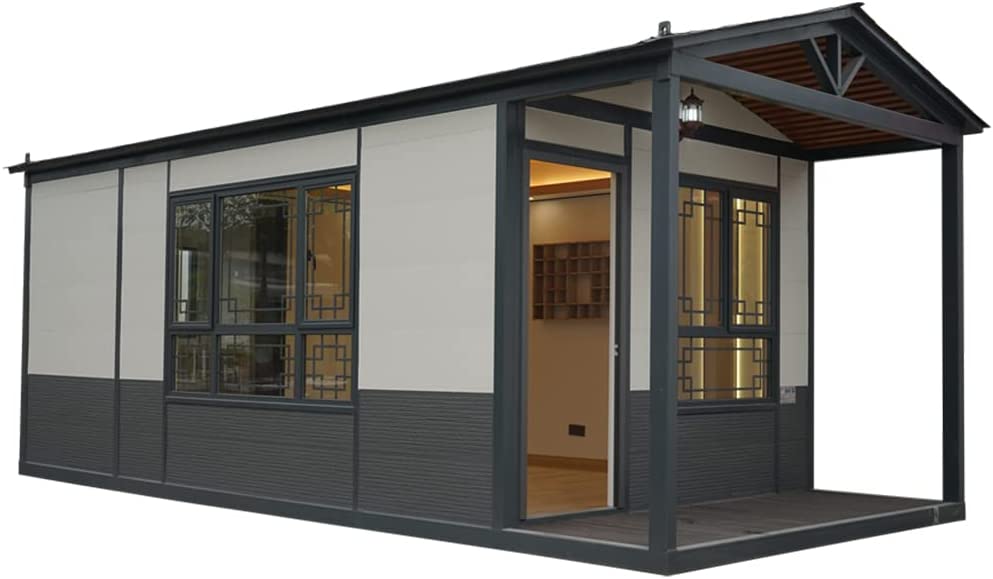
You can even buy prebuilt time homes and small cabins from Amazon and have them shipped to your door. There are a few options out there, including this impressively outfitted container home from Puzhong with a generous 200 square feet of living space, and even a bathroom.
If you’re looking for something slightly smaller and more minimalist, without sacrificing style, this outdoor storage and work cabin from Windemere boasts:
- Functioning windows
- Two arched vents
- Roof overhangs
The interior design includes one shelf, one workstation, and a loft for storage. Peak height is 10ft and the walls are 7ft high, making this a roomy option – especially at this low cost. The building materials are robust and supported by a limited material warranty.
6. Special Mention — Canadian log cabins under $10k
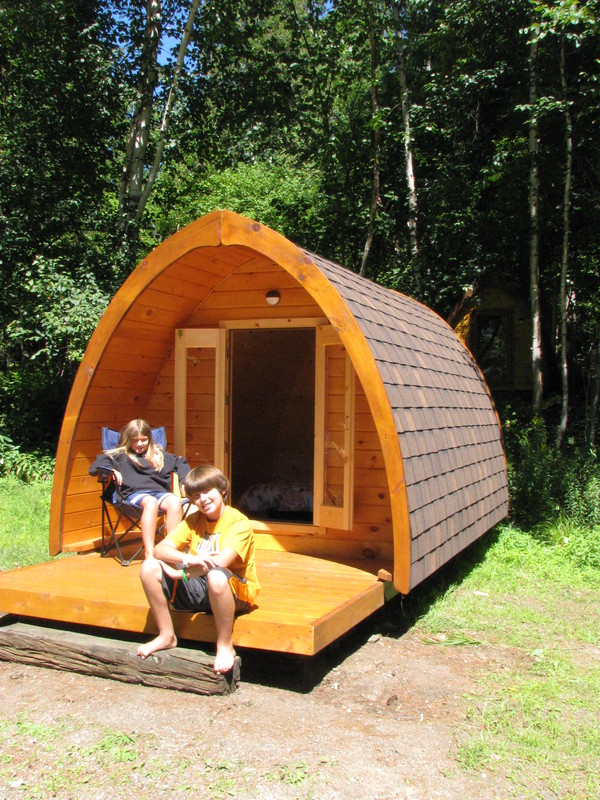
If you’re looking for a prebuilt cabin in Canada, check out Algonquin Pod Company. These arched cabins offer plenty of affordable space, a fun and charming look, and a wide range of upgrades and options to make yourself a cozy cabin in the woods.
These cabin homes are covered in shingles that protect the arched cabin from the elements and are easy to maintain.
The standard pod sleeps two adults and two children in 68 square feet of space and starts at $9,000 Canadian. There’s also the customizable Mini Pod or the family pod, which starts at $10,000 Canadian and sleeps four adults in 129 square feet of living space.
Inexpensive ways to upgrade your prefab cabin
Log cabins and prefab kits are minimalist in nature. That means there are limitless options for people who want to upgrade their interior design or even change the way the cabin is built to suit their needs.
1. Insulation
One simple upgrade you can do if you’re building a kit home is insulation. Spray-foam insulation, wool bats, or polystyrene foam blocks can all help keep your cabin from growing too hot in summer or too cold in winter. You can buy them cheaply from your local hardware or building supply store, and use them between the walls while you’re putting your kit together.
2. Add storage
Storage can be as simple as installing some adhesive hooks for hanging small canvas bags or cargo nets to keep things in check inside your home.
You can also pick up some pre-owned cabinets and shelving from salvage yards or marketplace websites. Look for discarded items from home renovations to add to your cabin.
3. Install windows
If you’re handy with your hands, you can install better windows in your cabin. Many come with plexiglass panes instead of true glass. Prebuilt cabin builders do this to keep costs down and also save weight. You can replace these openings with glass panes or even functioning windows, so long as the exterior wall can handle the extra weight.
Make your cabin your castle
The great joy of prebuilt cabins is that they are simple, light, and offer plenty of opportunities for owners to customize and personalize their home. Whether you want to make it more practical, prettier, or just make sure you have the conveniences and comforts you need in your studio or weekend getaway, it’s easy to buy an inexpensive log cabin of your own and make it suit your family.
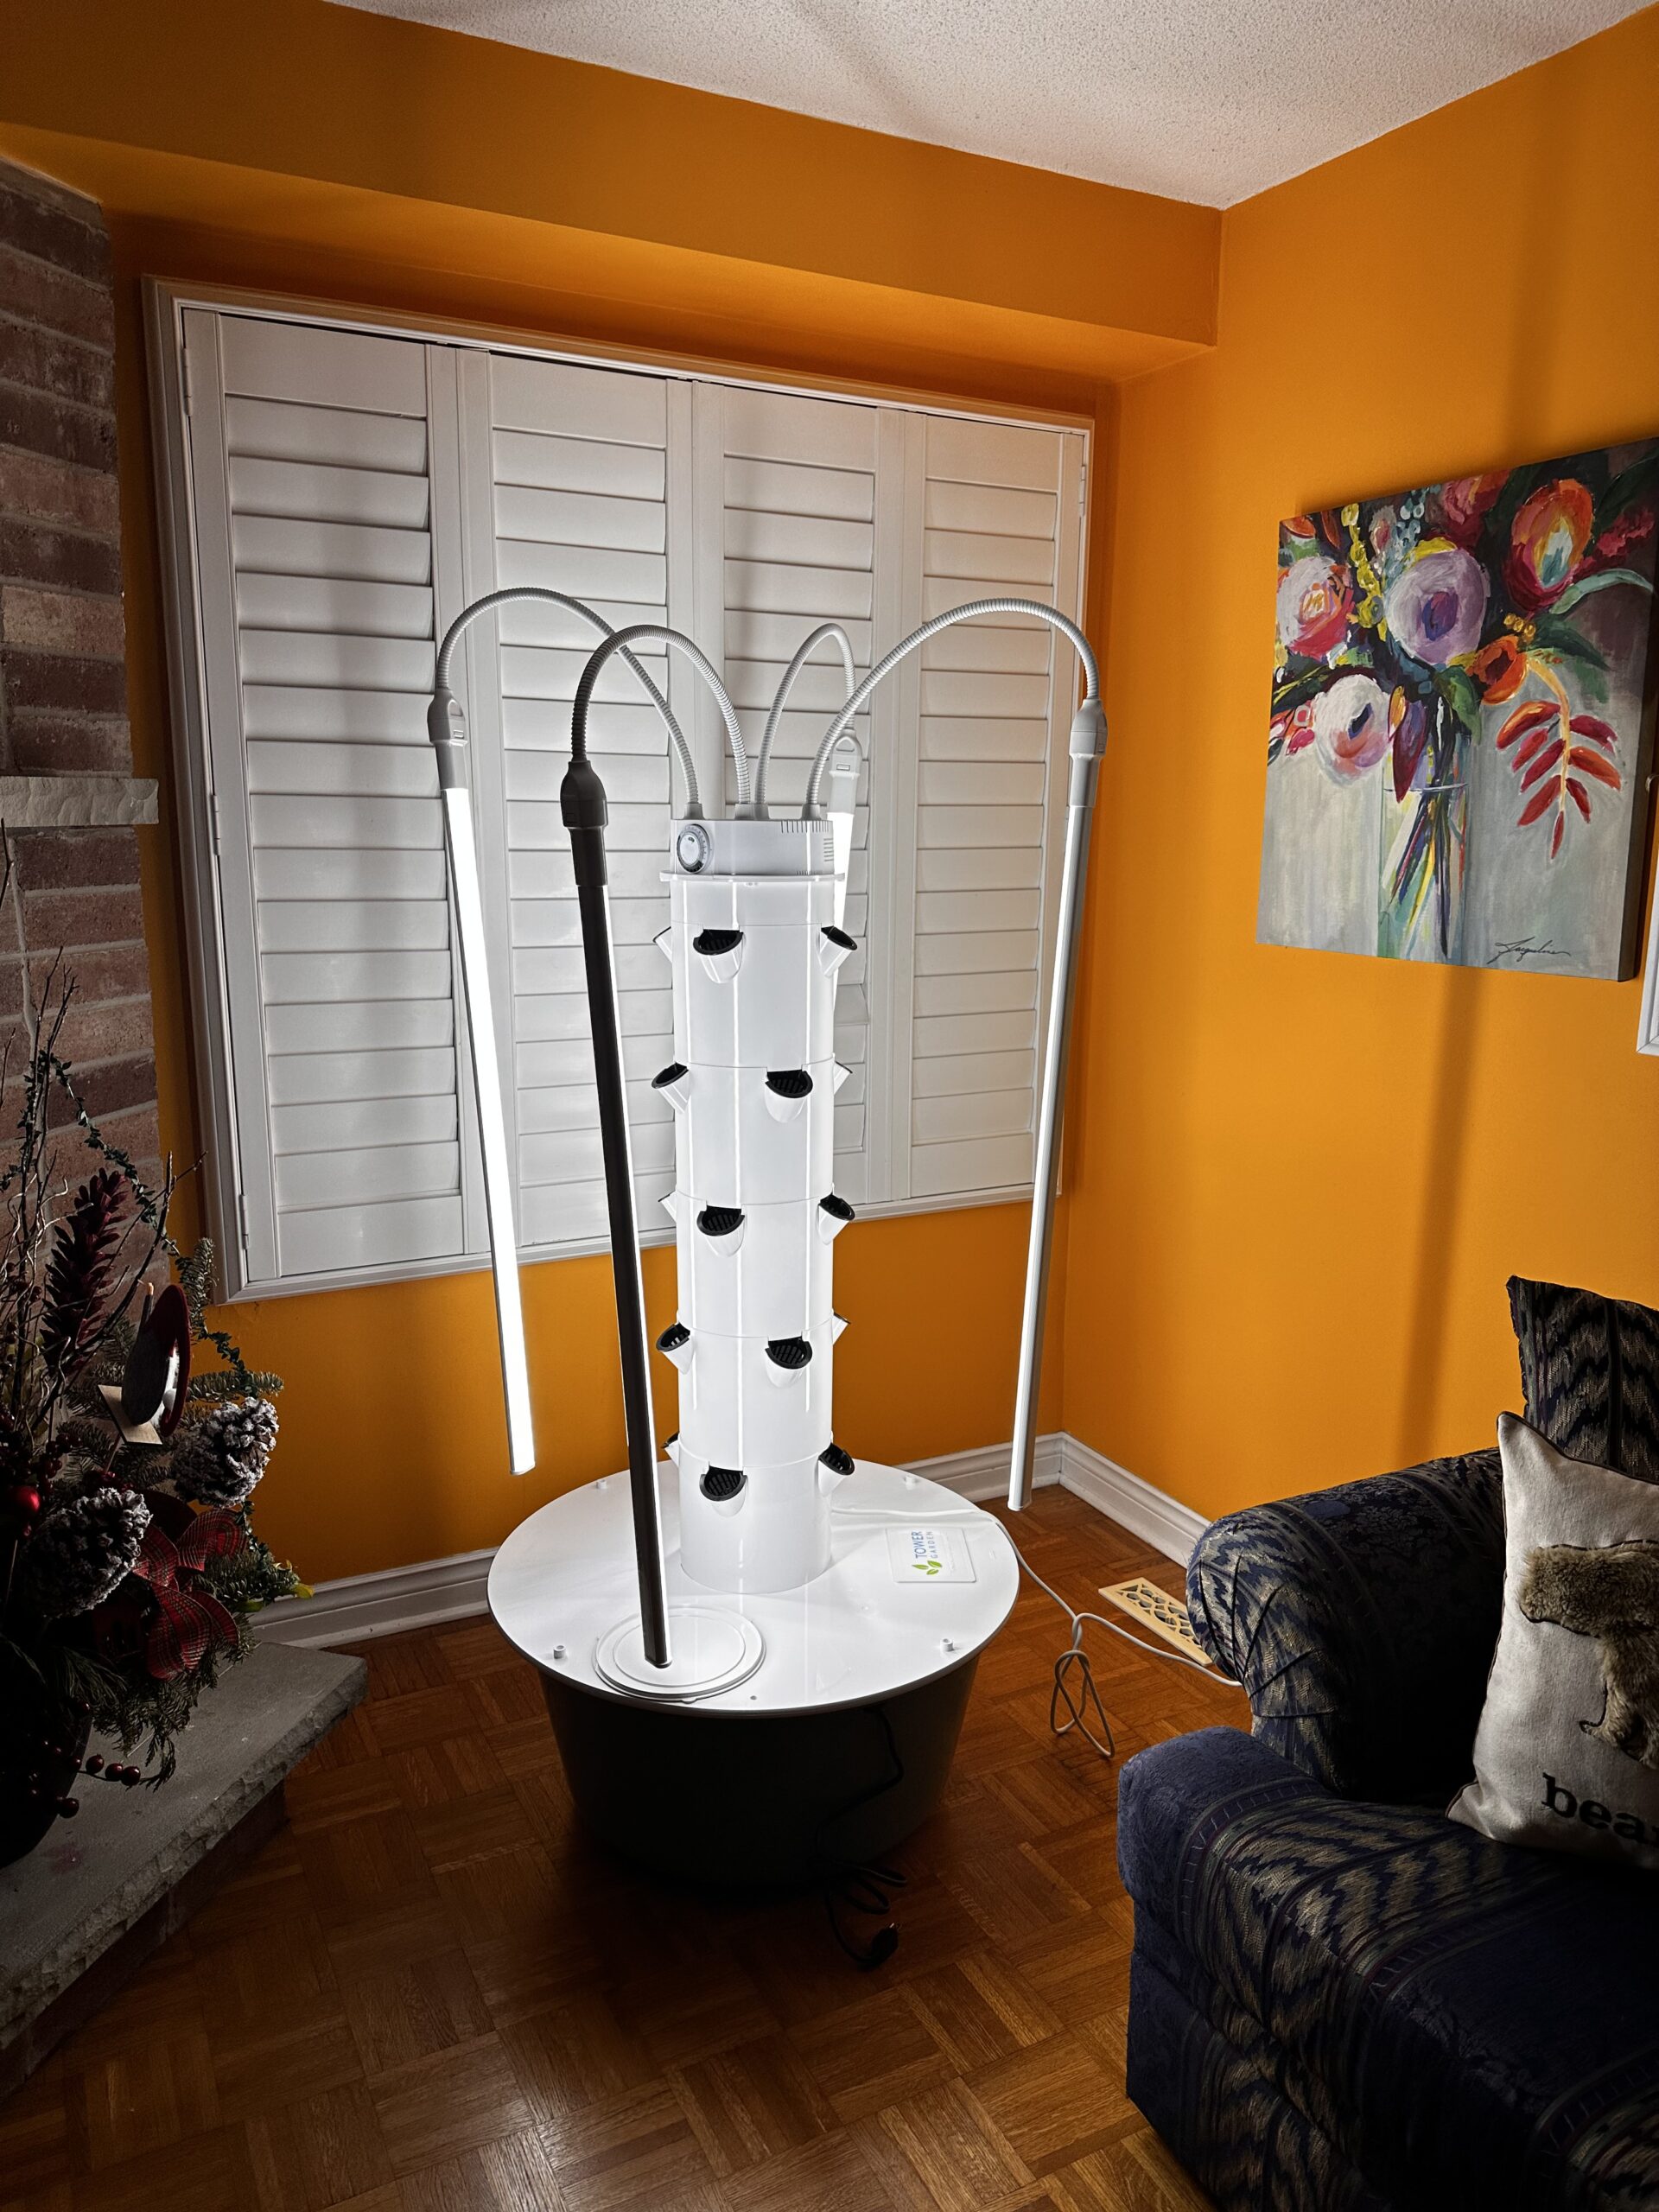
Tower Garden Review : In-depth look at Tower Gardens
At SuperTinyHomes, we’ve recently discovered Tower Gardens and have fallen in love with them. Over the next few months, we’ll document our experience using the product and watching the products grow – now, onto our tower garden review!
Tower Garden Review: Are tower gardens worth it?
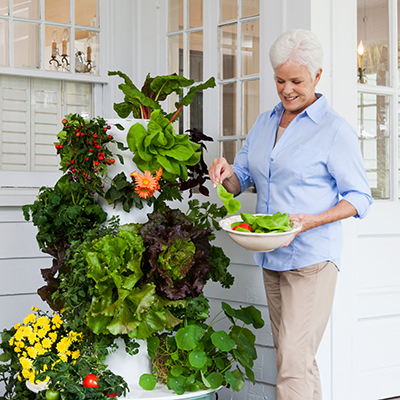
Anyone who is interested in saving space and water while also growing their own delicious vegetable garden should look into a Tower Garden.
The way these systems work to cultivate healthy plants in as little as three square feet and with only a tiny amount of maintenance is appealing to anyone with a busy lifestyle or limited space, or anyone interested in indoor growing.
In short, a tower garden lets you have your very own vegetable, herb, or even flower garden, no matter where or how you live.
This Juice Plus Tower Garden review will explore the aeroponic gardening system and help you understand how it is, and how it works, even if you’re a beginner.
What is a Tower Garden?
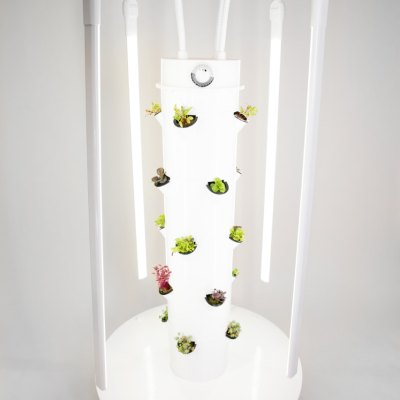
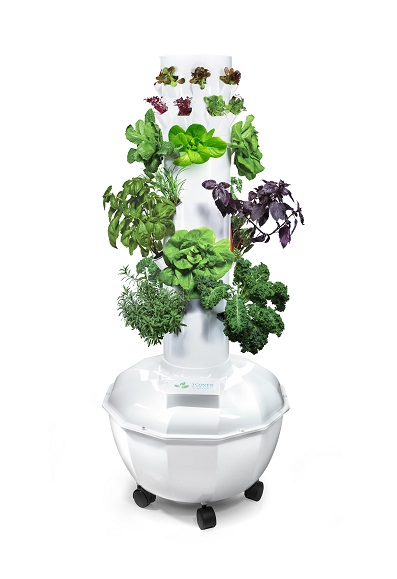
A Tower Garden is an aeroponic system that lets you grow healthy plants and vegetables in very little space, either indoors or outdoors, and with far less water than you typically need. The aeroponic tower garden completely does away with soil too.
Aeroponics is an evolution of the hydroponic garden. Instead of growing plants in beds of water as with a hydroponics system, aeroponics systems let the roots and plants hang suspended in air, and it supplies the nutrients and water needed through a fine spray or mist.
A hydroponic tower would be heavy and cumbersome, aeroponic Tower Gardens solve this problem and make hydro easier and more efficient.
There are dozens of types of indoor hanging grow systems. You may have heard of Mr. Stacky Hydroponics, or the Lettuce grow tower. Tower Garden is an innovative take on these systems.
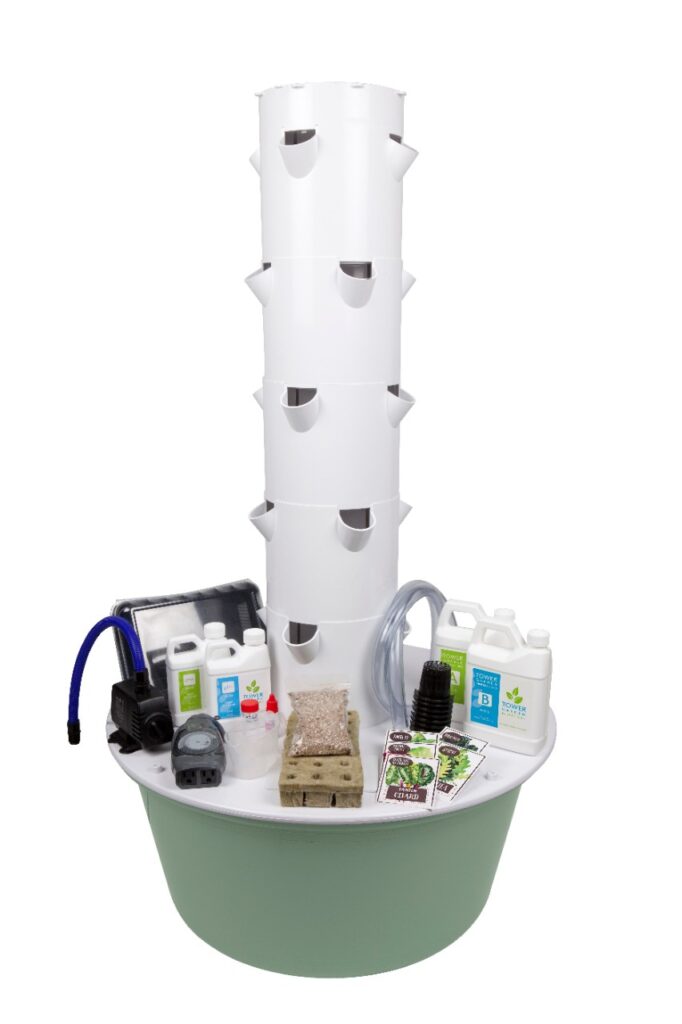
The base Tower Garden Flex consists of:
Vertical grow tower for up to 20 plants
- Seed germination tray
- 20 rockwool cubes
- Vermiculite and net pots
- Pump
- Timer
- Drain tube
- Two gallons of tower Garden Mineral Blend plant food
- A pH test kit and one bottle each of pH adjusters
- Starter crop of:
- Arugula
- Bibb Lettuce
- Rainbow Chard
- Gourmet Lettuce
- Black Magic
- Dino Kale
- Sweet Basil seeds
You’ll also get dedicated customer support as well as educational resources and growing tips to help you move from beginner to expert.
From there, you can expand to a larger Tower Garden Home for up to 32 plants, and you can add accessories like grow lights to help support your indoor Tower Garden. The grow lights are designed to integrate with the grow tower.
How Does a Tower Garden Work?
Setting up a Tower Garden is easy, you simply pour some water and the nutrient blend into the reservoir. Then, you place the seedlings for your veggies, herbs, or flowers into the small Rockwool cubes. These cubes act as the soil would in that they support the roots of your plants while they’re growing.
A water pump set to a 15-minute time disperses the water and nutrient blend mix down over the plants to help them grow. The whole system takes about 25 minutes to set up and from there takes just a small amount of weekly maintenance to keep on growing.
There are grow guides and resources on the Tower Garden website to help guide beginner green thumbs through your first growing season, so you can quickly become comfortable with growing and harvesting your own crops.
How often do you have to water Tower Gardens?
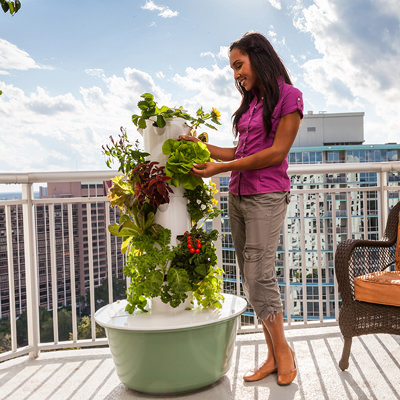
You only need to water the system once every 10 to 20 days. This depends on what type of plants you have, and how mature they are. Larger, leafier, and more mature plants usually take more water than smaller seedlings.
What are the pros and cons of Tower Gardens?
Tower Gardens have benefits over a traditional garden, as well as alternatives like buying your herbs and vegetables from the store.
Benefits of the Tower Garden over traditional gardens include:
- You can grow indoors
- You can grow on balconies
- You don’t need a garden
- Herbs and veggies grow faster
- Tower Garden uses less water
- Tower Garden works in a small space
- It is less susceptible to pests and bugs
- You use less water
- You don’t need to do any weeding
The pros of growing your own food versus buying it from a store are plentiful. They include:
- You save money on fresh food
- You control production in your organic garden
- You know your food isn’t tainted by chemicals
- You choose what to grow from as many as 152 different plants
- Food has more flavor and nutrients
- You can grow any herb or vegetable you like year-round
- Growing your own food has mental health benefits
- Kids are more likely to eat leafy green veggies they helped grow
There are some things to consider before deciding if a Tower Garden is right for you. Cons of this growing system include the fact you can’t grow root vegetables or fruit in a Tower Garden.
You will need to test and balance the water in your garden frequently to make sure the pH level is correct. The aerogarden needs to be dismantled and cleaned out at the end of every growing season.
It is worth noting that the water pump in this aeroponic system can be noisy, so you will want to make sure your indoor garden is away from bedrooms.
A Tower Garden system will work best for you if you have little space, like leafy greens, and enjoy gardening.
How much does the Tower Garden cost?
The Tower Garden Flex growing system starts at $810, which you can pay in 12 monthly instalments of $67.50.
You can get the aeroponic Tower Garden Home for $870 or $72.50 per month for 12 months.
Both systems are backed by a 12-month warranty.
High-quality accessories like grow lights, an extension kit, and other tools to help you grow up more efficiently start from as little as $10.
The monthly payment system makes it easy and affordable to start your DIY garden tower project without breaking the bank.
If you move out of a small space into a larger one, or you grow your family, you can expand your garden tower 2, 3, or 10 times over. You can even buy Community Tower Gardens.
The best place to buy your vertical container garden is directly through Tower Garden. You won’t find it on Amazon.
Tower Garden Flex vs Tower Garden Home
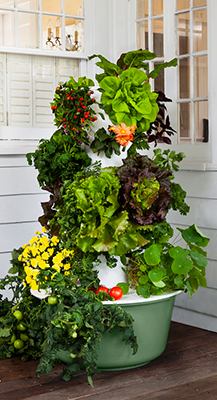
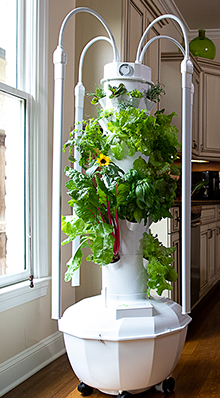
Tower Garden Flex on the left, Tower Garden home on the right.
The Flex edition of this vertical garden has 20 spots for plants, but it is larger than the Home model, which has 32 spots. That’s because the Flex is designed to grow larger plants and veggies like lettuces or cucumbers and tomatoes, while the Home is intended for smaller plants and herbs as well as edible or ornamental flowers.
The Home kit includes one gallon of mineral blend, and the Flex includes two gallons. While the Flex has less plant compartments, they’re larger, and the whole unit is 62 x 30 x 30 inches. You can also buy a support cage to help prop up larger crops.
The Home is great for microgreens and small spaces like apartments. It measures just 58 x 24 x 24 inches and has a smaller reservoir at the bottom.
Some families buy both systems and use one for smaller herbs and flowers while growing larger staple crops like tomatoes or even cauliflower in the Flex system.
Are Tower Gardens worth it?
It’s nearly impossible to put a monetary value on the peace of mind and satisfaction that comes from growing your own food for your family with your own two hands. Knowing that you are eating food you grew, free of pesticides and other chemicals.
The accomplishment of watching a seedling develop into a salad is a proven source of endorphins, and gardening is a great way to improve your mental health. An indoor Tower Garden can also add greenery and light to your home, helping you feel calmer, and more relaxed.
As an added bonus, you get to eat what you grow, saving you money at the store. Tower gardens also make it more likely you’ll eat greenery which is highly beneficial to your health and longevity.
These grow systems will begin to pay for themselves the moment you grow your first crop of herbs or vegetables and will keep giving back for years to come.
One study by Urban Farms planted a variety of vine plants like cucumber, tomatoes, and eggplant alongside celery, lettuce, herbs, peppers, and leafy greens including cabbage, lettuce, and chard in a Tower Garden for over six months. The study calculated the net value of produce in that time at $796. That was in 2014, long before the cost of groceries skyrocketed as it has in recent months.
Over the course of a year, you could grow between $1,500 and $2,000 worth of produce in your own home. Long story short: An aeroponic vertical garden is absolutely worth the initial cost over a single year, and that benefit only increases in subsequent seasons.
What grows best in a Tower Garden?
Any leafy green plant grows beautifully in this aeroponic system. There are 152 types of plants available from Juice Plus for your container garden system.
This includes 59 edible and ornamental flowers, 51 herbs, and 42 veggies.
Herbs like basil, mint, parsley, and rosemary thrive in the aerogarden. So too veggies including arugula, lettuce, and even cucumbers or tomatoes.
There’s no limit to what you can grow, but small to medium plants will fit the best in your indoor garden, and get the best results from grow lights.
If it’s leafy and green, you can grow it. Even more delicate plants that might be susceptible to contaminated soil or harsh weather thrive in this vertical garden because there is no soil. Indoor gardens are particularly hardy because they’re not exposed to the elements and you won’t find your vertical garden raided by birds, bugs, or other wildlife.
How to Care For Your Vertical Garden System
It’s important to test and balance the pH levels in your unit on a regular basis. Checking pH weekly will help keep the right balance of nutrients flowing steadily into your plants.
Making sure you trim your plants and their roots regularly, as well as keeping active with harvesting will help keep the plants in the best condition possible too.
At the end of every growing season, or before you conduct a fresh planting, you should clean your unit. To do this drain the water:
- Unplug the pump and attach the drainage hose
- Place the draining hose end in your sink or tub
- Run the pump to drain out most of the nutrient water
- Stop before the reservoir is empty so the pump doesn’t run dry
- Pour out the remaining water by hand
Then disassemble the Tower Garden in these steps:
- Remove the plants carefully – you can replace them later if they’re healthy
- Unstack the tower sections
- Brush away any roots or plant material
- Remove the blue hose from the reservoir lid
- Soak the unit in warm soapy water for 30 minutes
- Brush and scrub each section
- Rinse your system thoroughly
- Reassemble
If your reservoir has hard water deposits or stubborn dirt, you can use a solution of vinegar and water, or baking soda and hydrogen peroxide with soap to clean it more thoroughly. Use a toothbrush or other small brush to get into every crevice to really clean your system well.
Choosing a Tower Garden For Your Family
It’s easy to choose the right tower garden and grow crop for your family. First, consider your available space, what sort of crops you prefer, and how many plants you’ll need to grow to suit your needs.
How Will You Use Your Tower Garden?
It’s possible to grow an entire greek salad right in your own home using the Tower Garden Flex, but the smaller Tower Garden Home can still generate plenty of leafy greens and vibrant, flavorful herbs.
You can grow beautiful flowers like Hibiscus, Forget-Me-Nots, or Petunias to place as the centerpiece on your table too, making your aeroponic gardening system a one-stop shop for your entertaining needs.
Conclusion
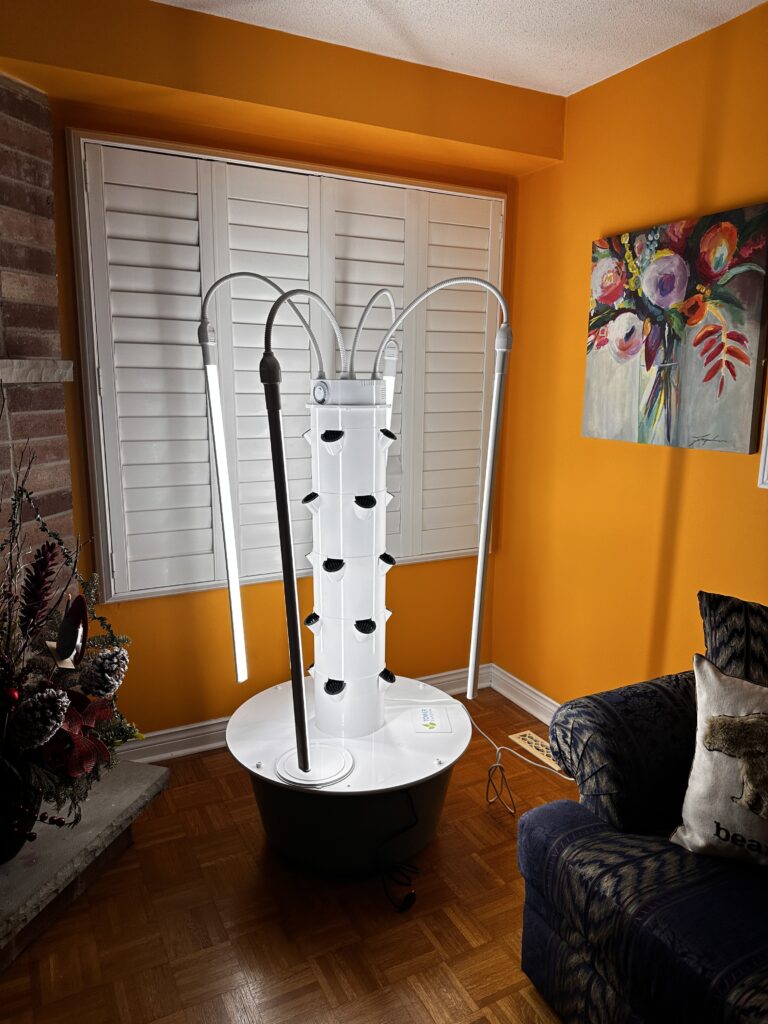
Ultimately, we love our Tower Garden a lot and are excited to provide updates and new articles on our experience. If you like this article, or have any questions on how to buy a Tower garden – or set one up, feel free to drop a comment below!