Blog

Backyard Office With (Really Useful) Lofts: What To Consider
Unless you build a gigantic (and expensive) backyard studio, you will likely struggle with a lack of storage space inside your backyard office. Even if you are pretty much ‘paperless’, there might be equipment that you only use a few times a year. It probably does not make sense to have this lying around in your office, taking up valuable space. So what are your options? You could take it inside your home when it is not in use, although this can be annoying. An easier option is to store it in the office’s loft, alongside any other documents that you need to keep (but not use regularly).
A loft in your backyard office is definitely possible to achieve, even on a budget. There are important things to consider, however, such as how high your roof (and ceilings) should be, and what type of ladder you use. Some ladders can take up a lot of space in the loft: space that you then cannot store items on.
This article explores these considerations in more detail, including how you can retrofit an already-built office with a loft (if this is possible to do).
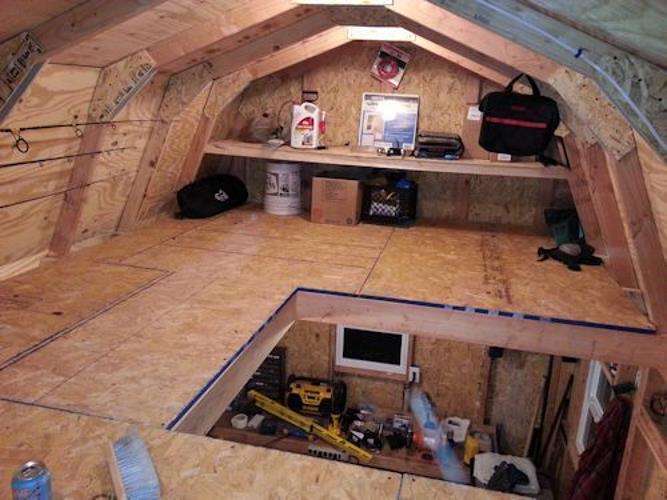
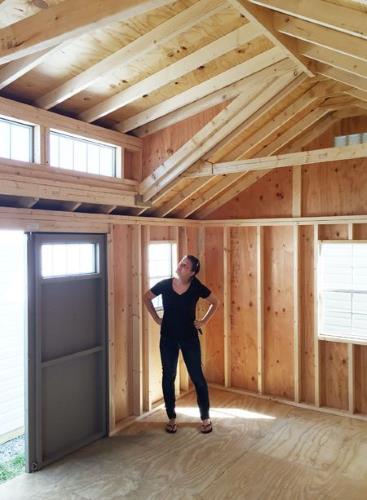
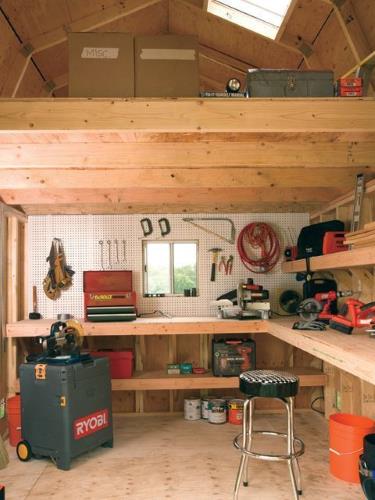
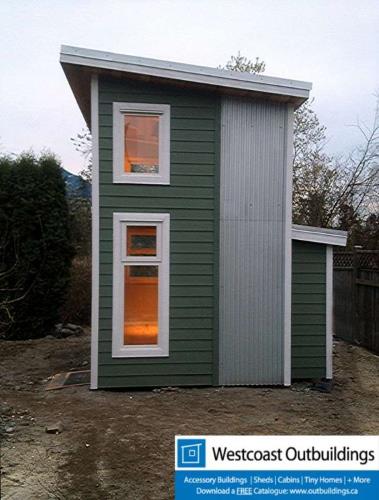
Photos of Backyard Offices/Studios with a Loft
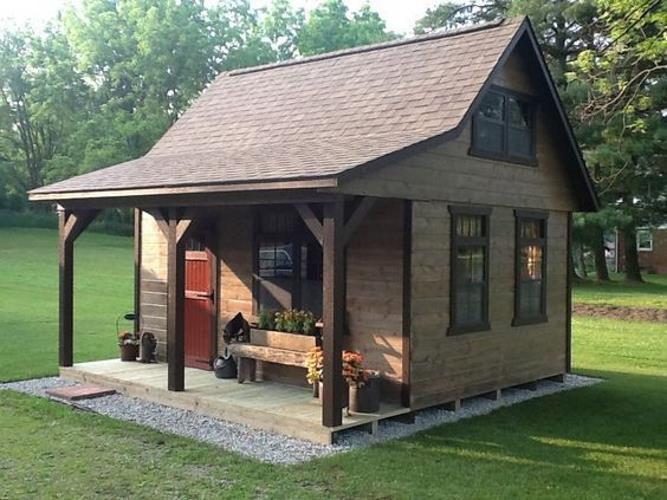
Before we go into the specific information about getting a loft in your backyard office, we wanted to show some great pictures to help get you inspired (and also show how useful they can be):
What You Need To Know
Before building your backyard office, it is worth thinking about whether you want a loft because certain designs will not allow a loft to be (easily) added in later (something we cover in our final chapter). The main things to think about when building a backyard office/studio with a loft are:
- Roof design and shape, and ceiling height. A flat roof with little gap between the ceiling and roof will mean no loft is possible, for example.
- Roof insulation type, and height. Installing a loft over 300mm (12”) fibreglass wool (batts) insulation will be trickier than insulation which is flush to the roofing timbers.
- What loft ladder to buy. You can get ‘space saving’ ladders which attach to the loft, whilst some require a couple of square foot of space inside your actual loft (meaning you cannot store anything in that space).
- The weight of items you plan on storing up the loft. Most of the time you will be fine, but if you are planning on installing very heavy items, some loft boards (and even roof timbers) might not be up to the task.
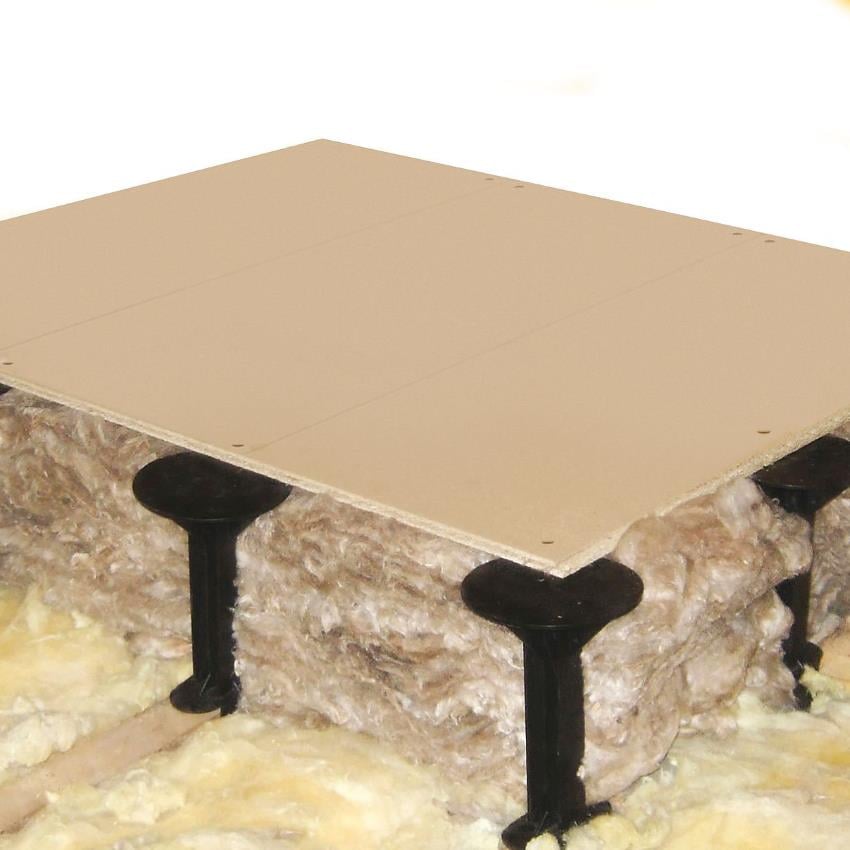
- Loft storage system. You could just put OSB/plywood boards directly on top of your roof timbers… unless your insulation exceeds the timber height (in which case loft stilts might be an option).
We take a look at these five main considerations below:
Roof Shape and Ceiling Height
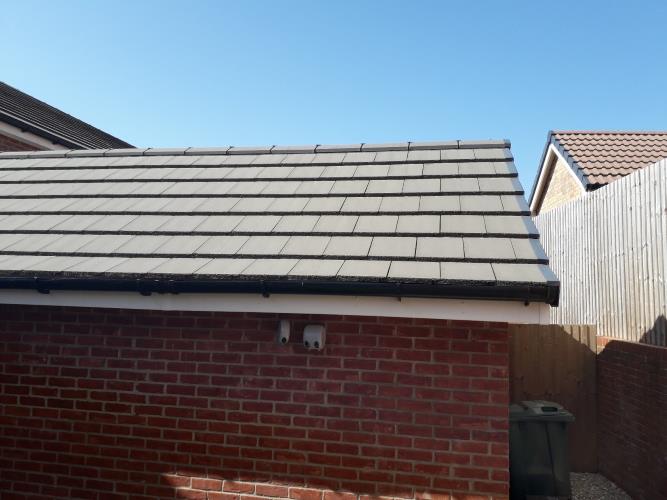
The style of roof height you have (and also the gap between your internal ceiling and actual roof) naturally determine whether a loft space is possible or not. A standard ‘gabled roof’ – most commonly seen on houses – tends to give a lot of space for a loft area, especially in the central part (where the roof height is at its peak):
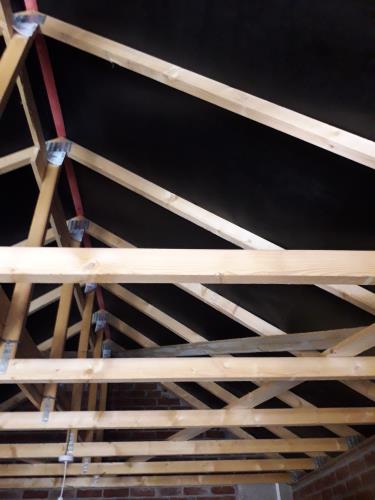
This compares to a flat roof (i.e. an almost flat, very slightly pitched roof) whereby there is usually very little space between the ceiling and actual roof line – sometimes the gap is just made up of the depth of the timber and insulation. Flat roofs are probably the cheapest option to build, and they naturally lead to a less-tall building than a gable roof. So a middle option would be good: one with a ceiling/loft void which offers enough space for some loft storage (and maybe with slightly smaller ceiling heights), but still with a much reduced roof-line compared to more-expensive gabel roofs:

In short, think carefully about the design of your roof and also how high you want (or are able to build) your overall backyard office. Any extra space for potential loft storage can be a bonus.
Roof Insulation Type and Height
It sounds fairly obvious, but the thicker your roof insulation, the less storage space you have. Whilst this might not matter too much with a large-height roof (such as a gable roof), every inch is important with smaller-height roof designs.
Equally if you have really thick (for example) fibreglass/batts type insulation – such as 16” (~400mm) – then this will protrude above your roof timbers. In this case you cannot simply put loft boards down on top of your roof timbers, otherwise it will squash the insulation and render it less effective. The solution in this case is to install loft stilts or strips along your timbers, and then secure the loft boards on-top of these:
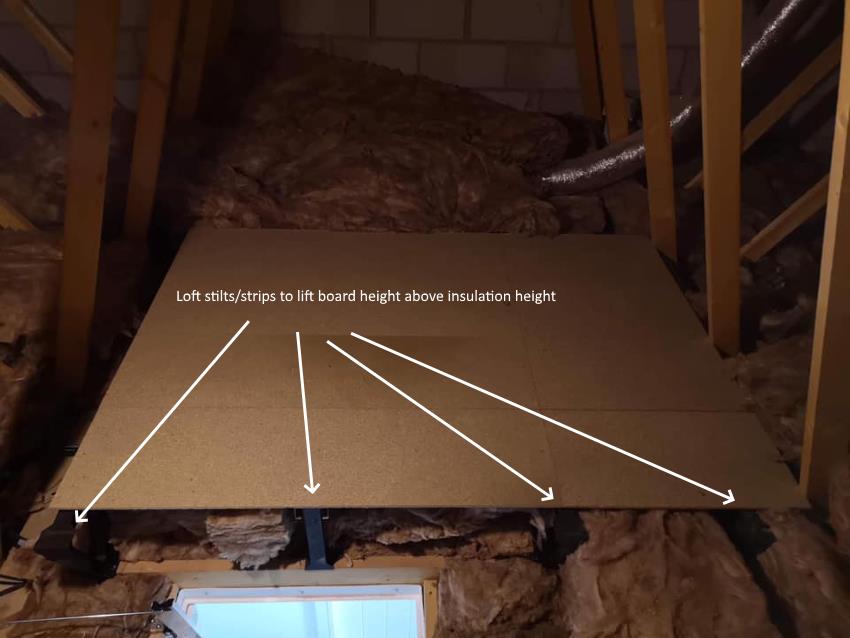
This is a good thing to do because you get the best of both worlds: lots of insulation (and hence warmth in your office), but you still have the ability to store items in your loft.
Best Loft Ladder for a Backyard Office
There are different types of ladders that you can use in the loft, but the two main things to consider are:
- Is it a “2 section” or “3 section” ladder? If it is just in 2 sections, it will take up more storage space when it is just in your loft (compared to a 3 section one which will take up one-third less space).
- Is it ‘stored’ on your loft floor or in the loft hatch? Ladders which attach to your loft hatch take up no practical space in your loft itself, meaning that more storage room is available.
An example of a 3 section loft-hatch ladder is:
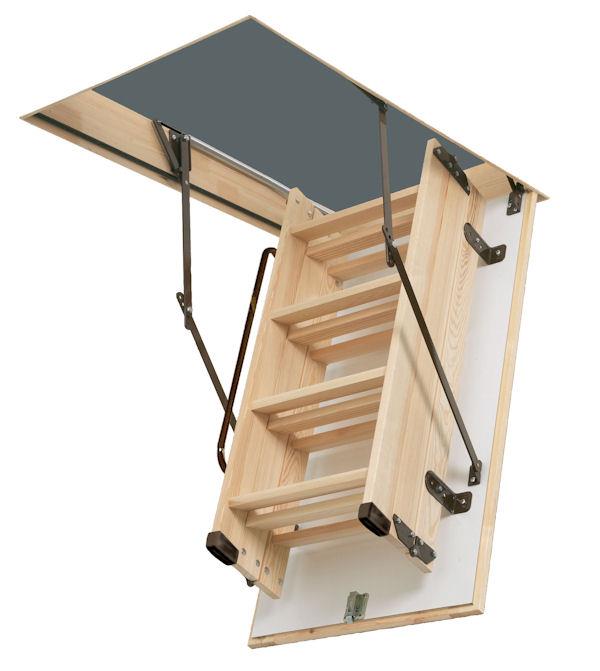
Whilst a 2 section loft-floor ladder is:

A 2 section loft-floor ladder is cheapest, but it also takes up 62” (160cm) of storage space directly in front of your loft hatch. Since this will be valuable space in a backyard office, we would always suggest a 3-section ladder (or even a concertina loft ladder) – and ideally one that attaches to your loft hatch, too, so that no storage space is taken up by the ladder.
How Item Weight Might Affect Your Plans
If you have really heavy equipment which you will not regularly use (and hence will ideally store away from your main office space), you might need to apply some common sense when thinking about whether it will be suitable to store up the loft.
Firstly, will you be able to safely carry it up the loft ladder to store it there? You should always have three points of contact on a ladder (such as both legs and one hand), which might not be possible if the items you are carrying are very heavy.
Secondly, we are not structural planners, however the roof timbers you use will determine how much weight you can store in your loft. Equally different loft ladders and storage systems will also have a weight-bearing capacity, which can cause serious damage (to your backyard office and/or yourself) if exceeded. For example, if you built a very lightweight roof from smaller-than-usual timbers (maybe because you originally only planned on using this building as a storage shed), you might not be able to safely store items (especially heavy items) in your loft. Heck, the roof timbers might not support your own weight either.
So apply some common sense when thinking about exactly what you need your loft for. Boxes of paperwork are usually not that heavy, nor is most common office equipment (like printers and computers) – so these should be fine as long as your roof is built sufficiently strongly.
Loft Storage System/Approach
Once you have decided on a roof type and are happy with using your roof/loft area for storage, the next item to consider is how you will add loft storage. Putting down plywood or OSB boards on-top of your roof timbers is the most common approach and will work well, unless your insulation height exceeds the height of your timbers. In this case, as we touched on earlier, you will then need to have your loft boards sit above the insulation. You have two main options here:
- Increase the roof timber height by screwing/nailing down more 2x4s (or whatever wood you used) on top of the existing timbers, to achieve the height you need (i.e. more than the insulation height).
- Use pre-made loft stilts or strips which attach on to your roof timbers, and end up sitting above (or flush with) your insulation:
We cover insulation in another article but naturally if you live in quite a warm climate, you might not have a need for insulation which exceeds your timber height – meaning that point (2) above does not apply to you, and you can simply attach boards to your timbers as covered in point (1). This is the easier (and cheaper) option, but we do not recommend skimping on insulation purely to make loft storage easier to install!
If you have already built your backyard office and (naturally) do not fancy removing the roof and carrying out major building work, we take a look at whether it is possible to retrofit a loft into your existing building in the section below.
Retrofitting Loft in Already-Built Office
A loft is useful for storing items in, however being able to have a usable loft mainly comes down to the roof type and height – as we explored earlier. But if you have jumped straight to this section, the following diagram probably sums it up best:
Looking at that middle illustration: if you have a simple flat roof which has no usable gap between your roof and ceiling (apart from the actual timbers and insulation), then you obviously cannot store items there:

In this case, your only option would be to lower your ceiling height or increase your roof height – both pretty massive tasks, which would take more than a week to do (and thus impact on your work since you could not use your backyard office in this time). However if you are able to do the work yourself, then assuming that time is not an issue this might only cost a few hundreds dollars in materials.
Equally if your roof has a leak and you need to re-do the roof shingles/tiles, this might also be an opportunity to increase the roof height by removing the main 2x4s, increasing the height of the roof by adding extra vertical timbers and then re-adding the 2x4s (or buying new ones, if they are now too short). Again, this would be a lot of work but it might cost less than hiring out third party storage space.
Of course, storing your items in your house or in extra storage units/shelves within your backyard office (if possible) would be better than ripping apart your roof purely for a few boxes!
Going back to the diagram earlier, if your roof has some usable space, then there is hope. Even if it is only a couple of foot high, this would be enough to put some files and boxes of paperwork up there (along with being able to get your head and arms into the loft to look around and add/retrieve items from the loft).
Once you know that you have enough height in your loft for storage, your next steps will be actually retrofitting the loft for storage:
- You will need to install a loft hatch, which will require knowing where the roof timbers are (since you will need to add more wood to form a rectangular hatch, then install any loft hatch kit on this). If you do not know where your timbers are, try buying a stud detector. Your drywall will be screwed or nailed onto the timbers, so detecting the screw/nail metal will also help you to find your timbers. You will need to make a bigger hole than just for your loft hatch, so consider removing entire drywall sections to give you the required space to work.
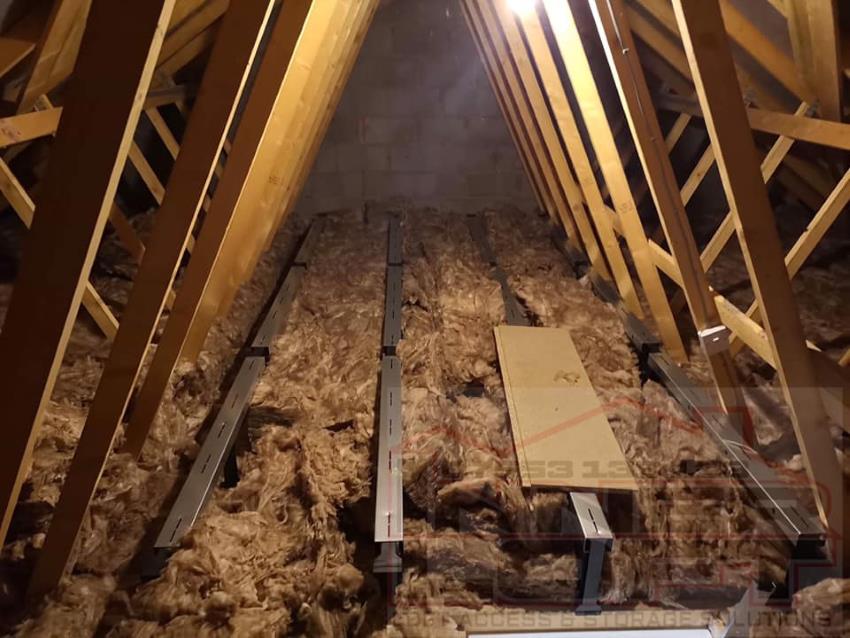
- With a loft hatch installed, get a temporary extension ladder and go into your loft. You will need to put your loft boards down, which may involve raising the height of your timbers (or adding loft stilts) – as covered earlier.
- Once you have a loft hatch and loft boards down, you can install the loft ladder you have chosen. As covered earlier, a 3-section ladder will take up less space (especially if it attaches to your loft hatch).
- Congratulations – your backyard office now has a loft with usable storage! Put your random items up there until you need them… or until you forget about them and someone else finds them in the future!